Quantcast
Channel: The Polish Well
Viewing all 71 articles
Browse latest View live

Press Release: China Glaze App!

$
0
0
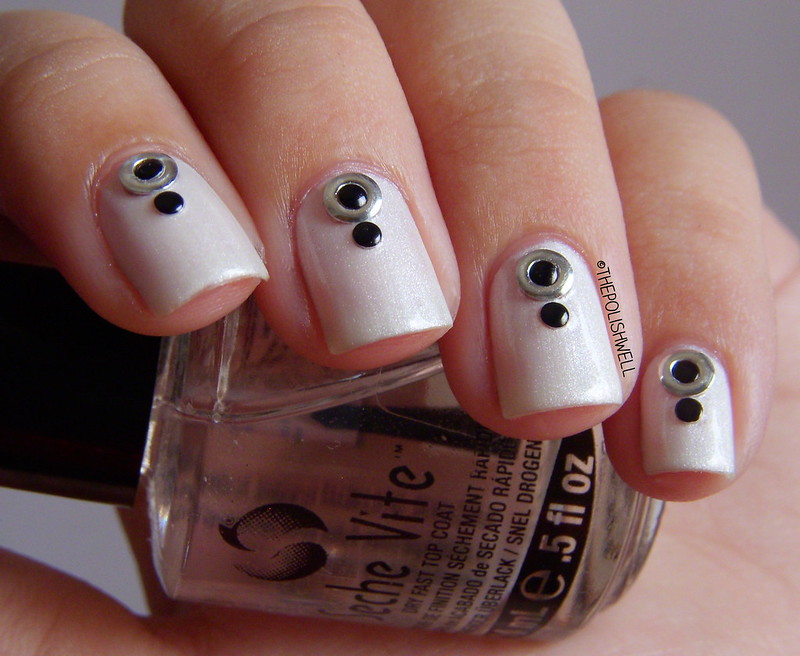
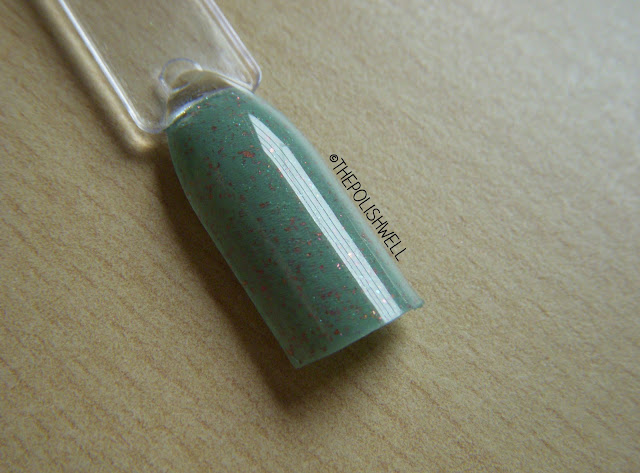
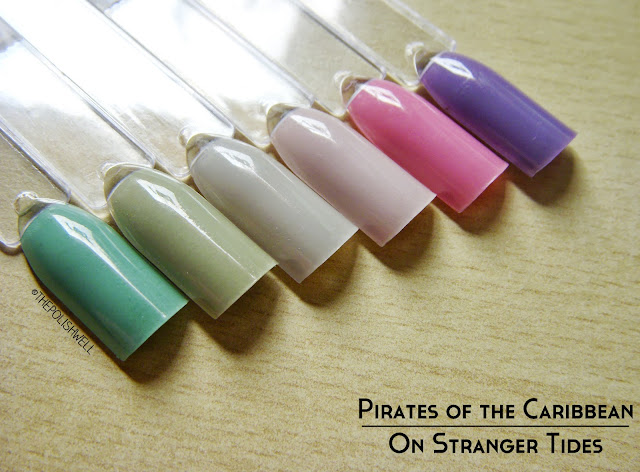
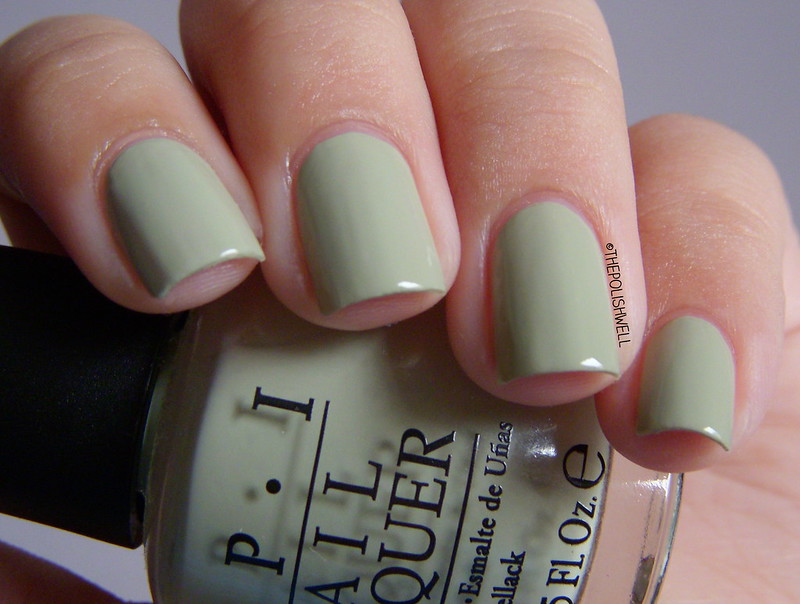
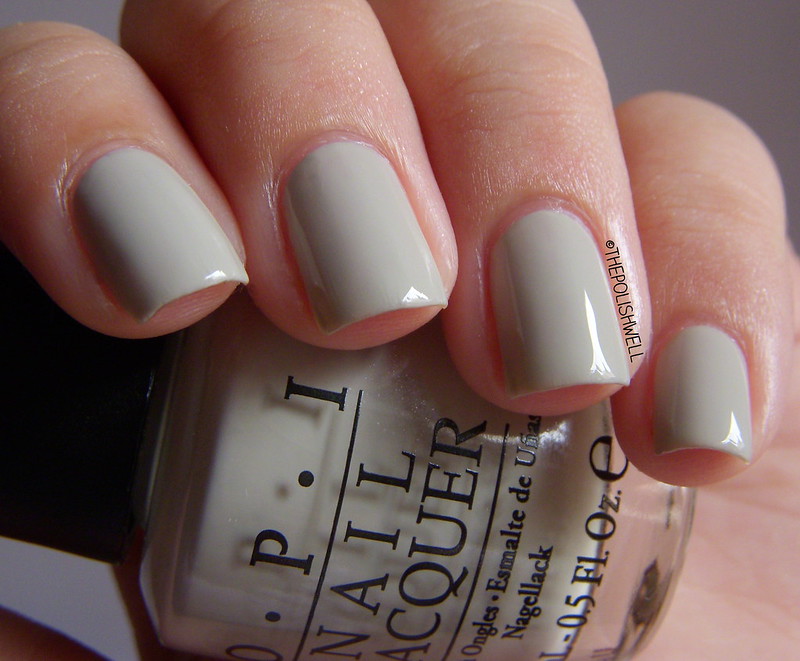
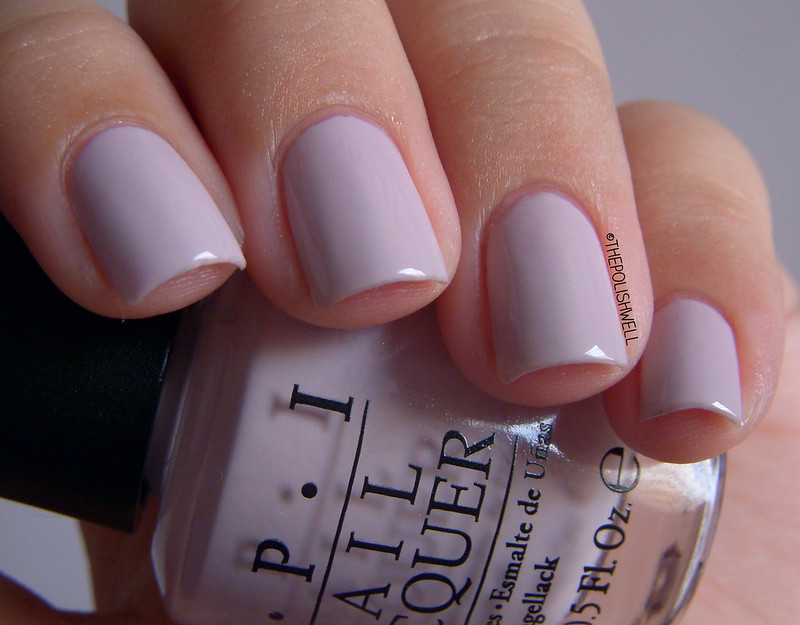
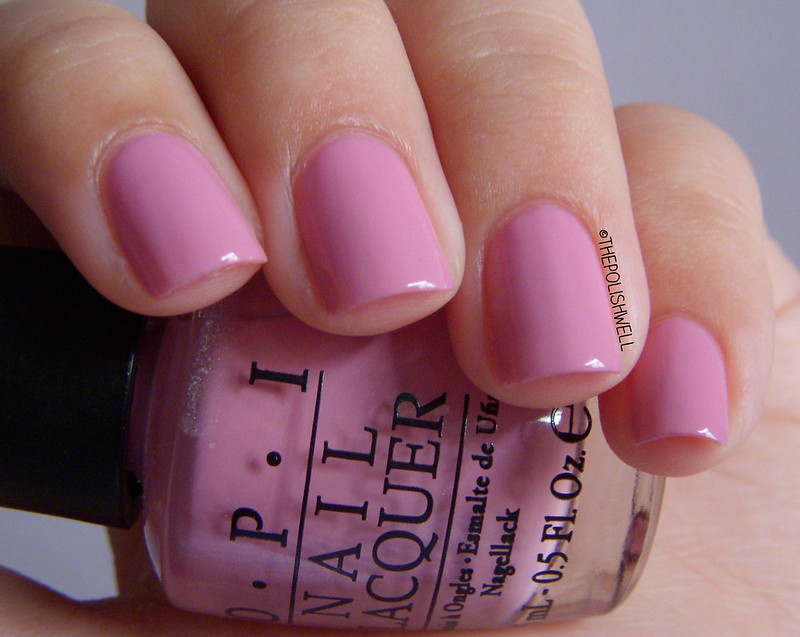
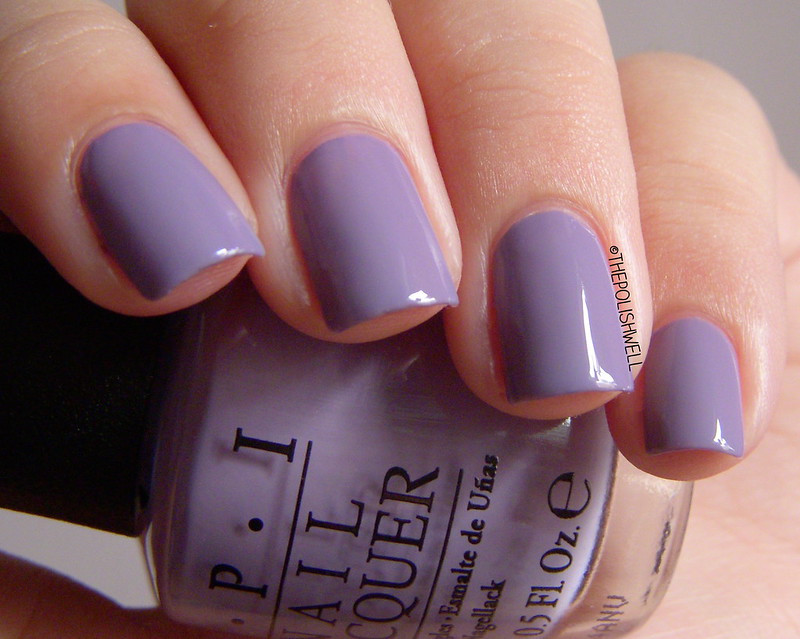
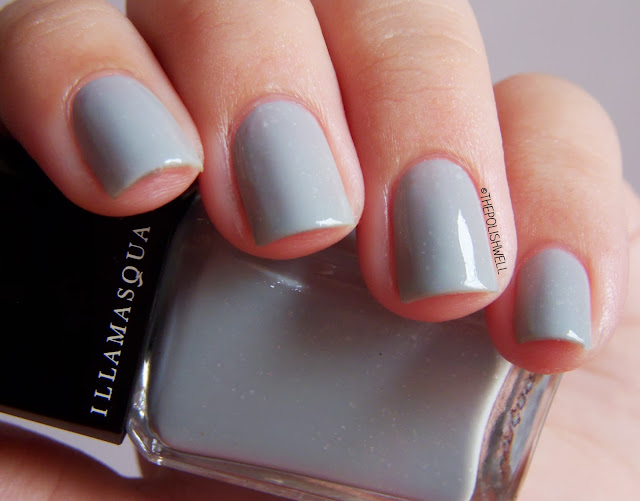
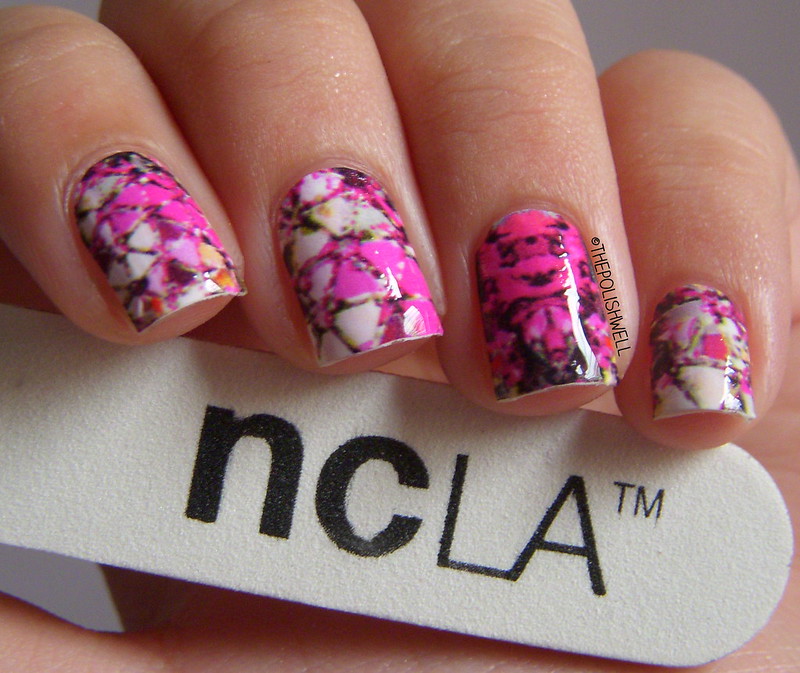
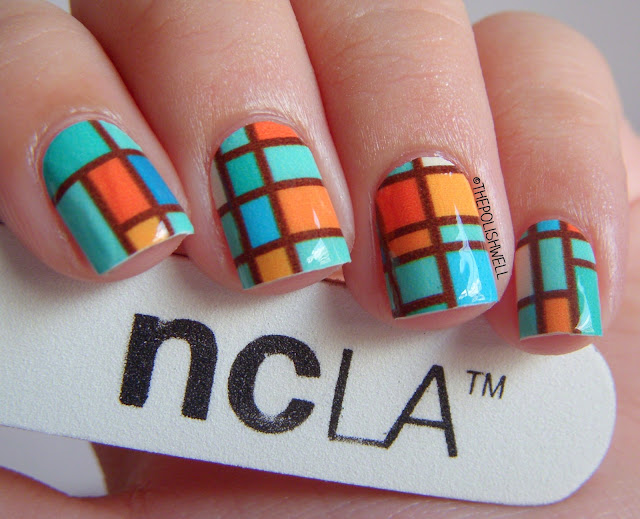
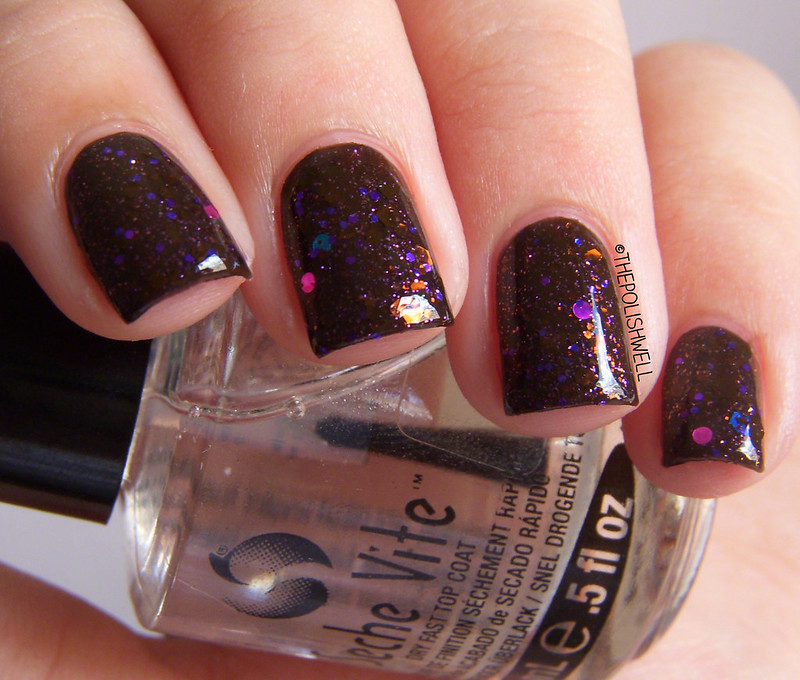
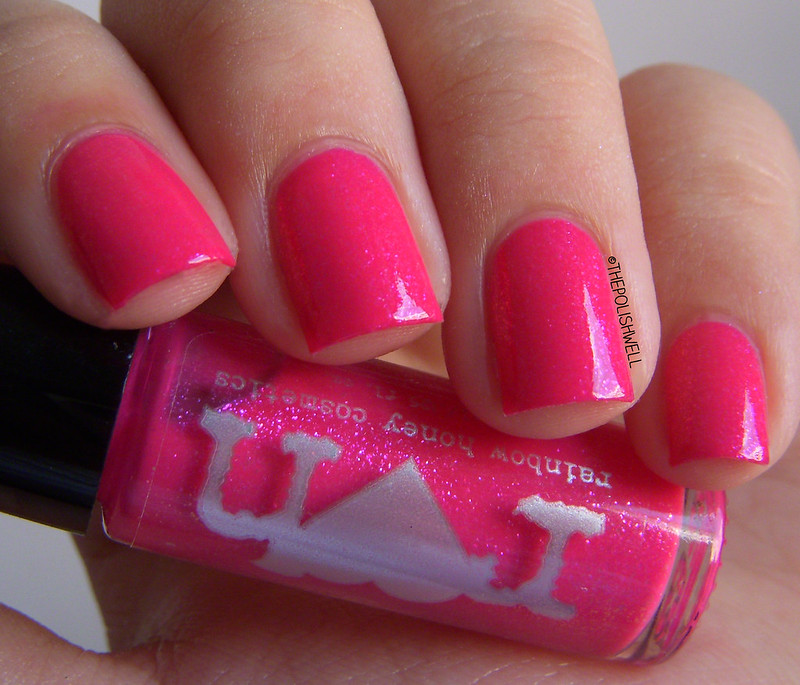
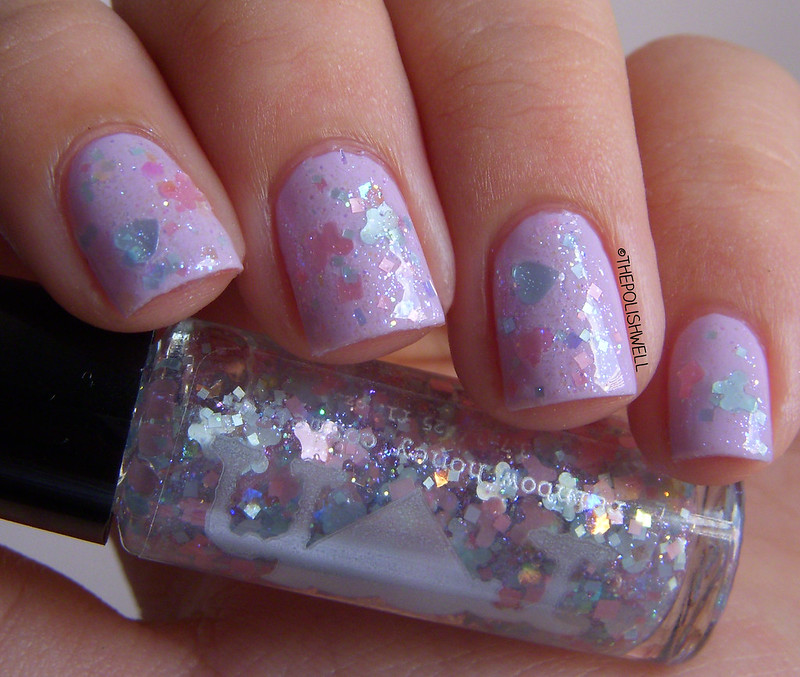
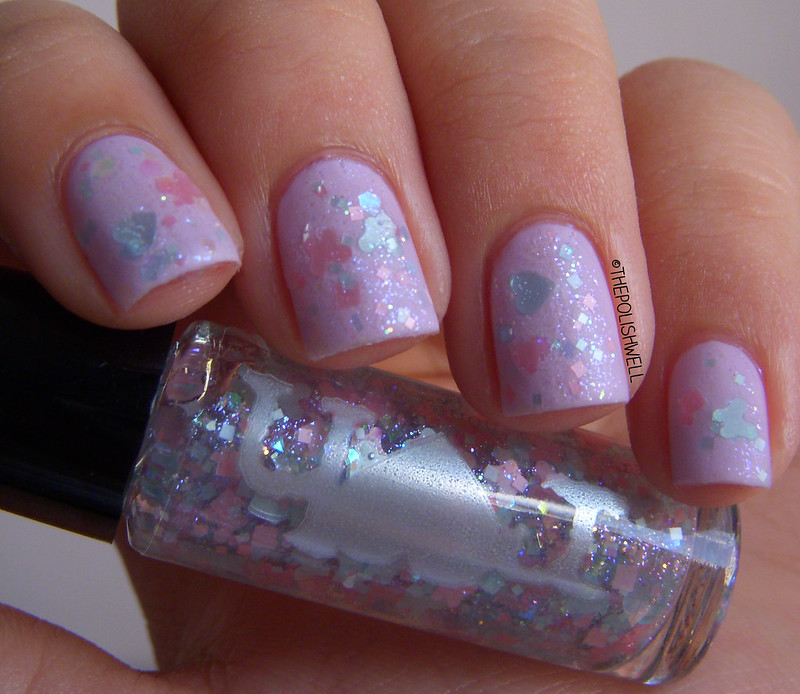
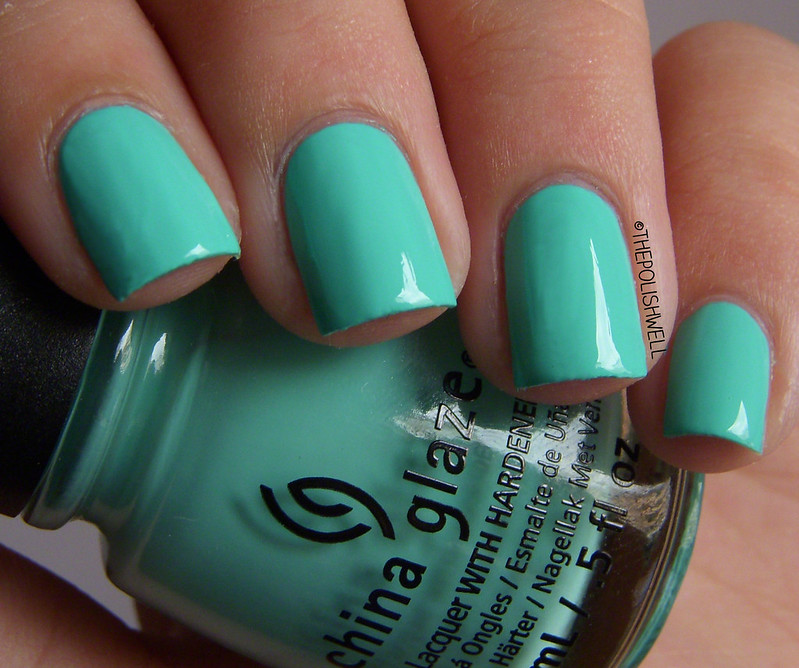
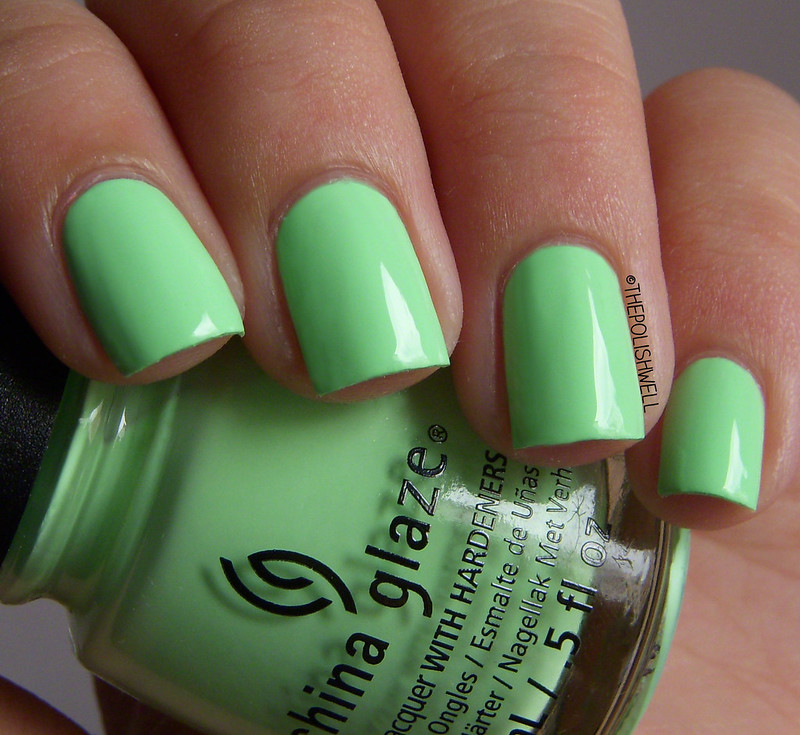
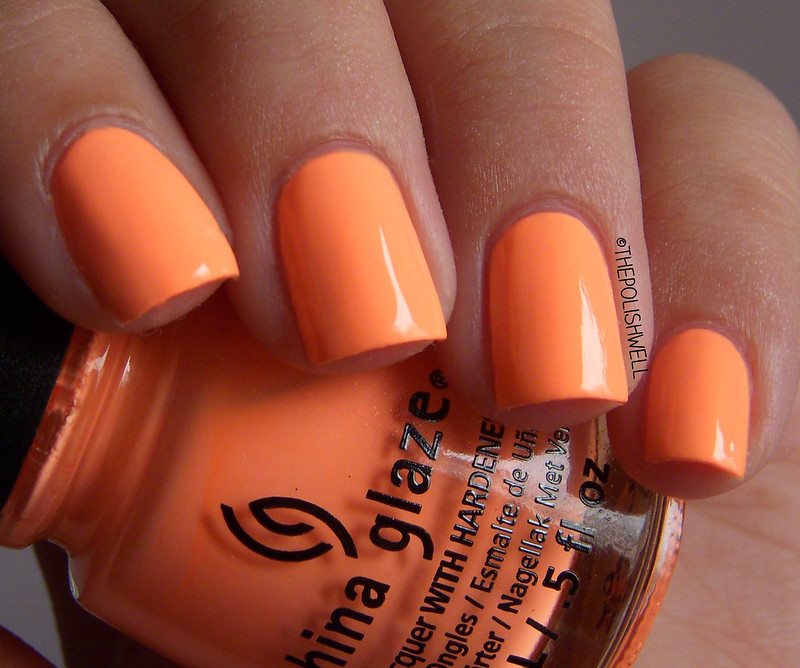
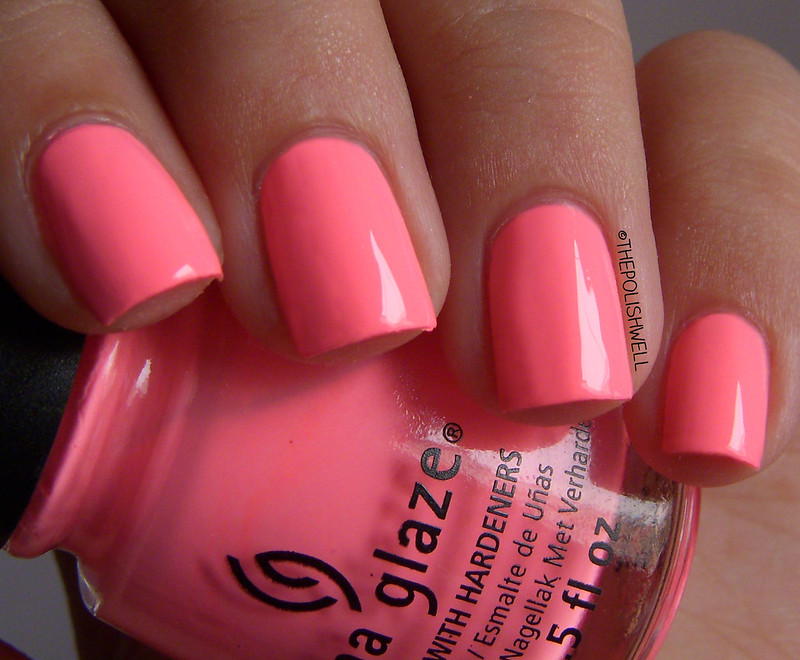
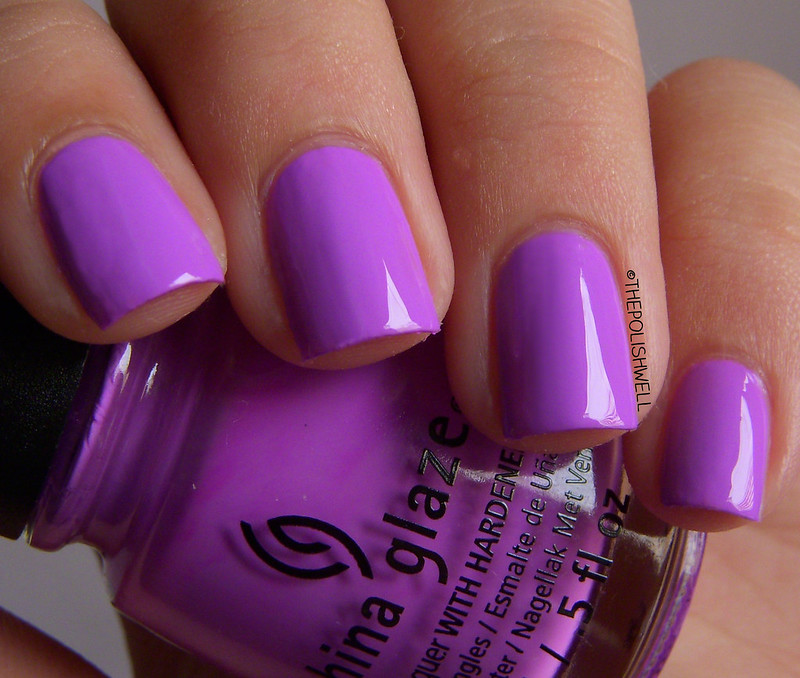
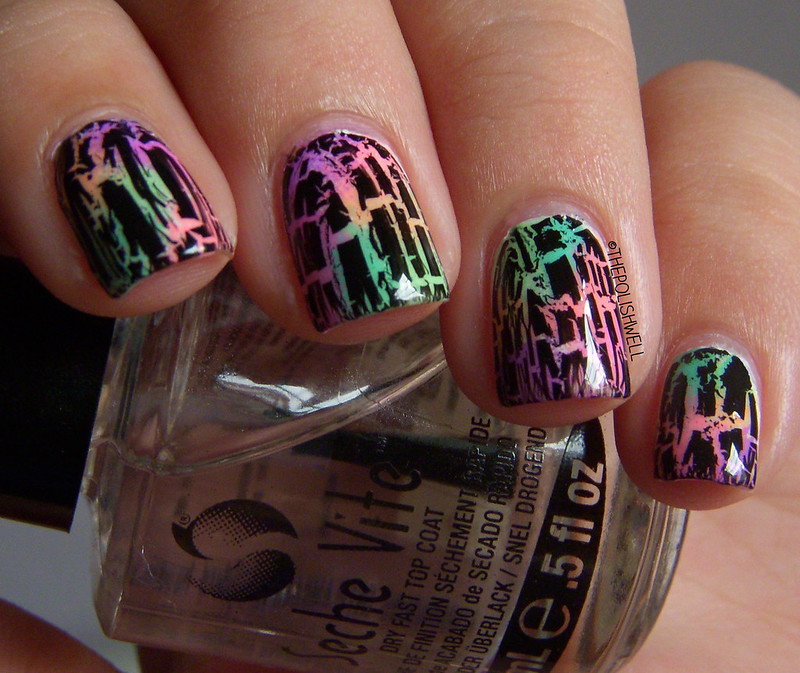
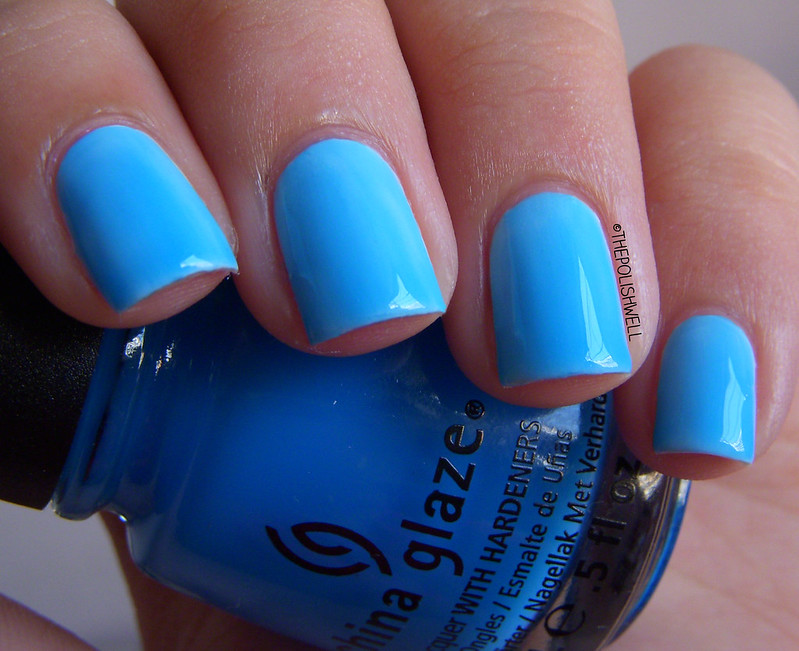
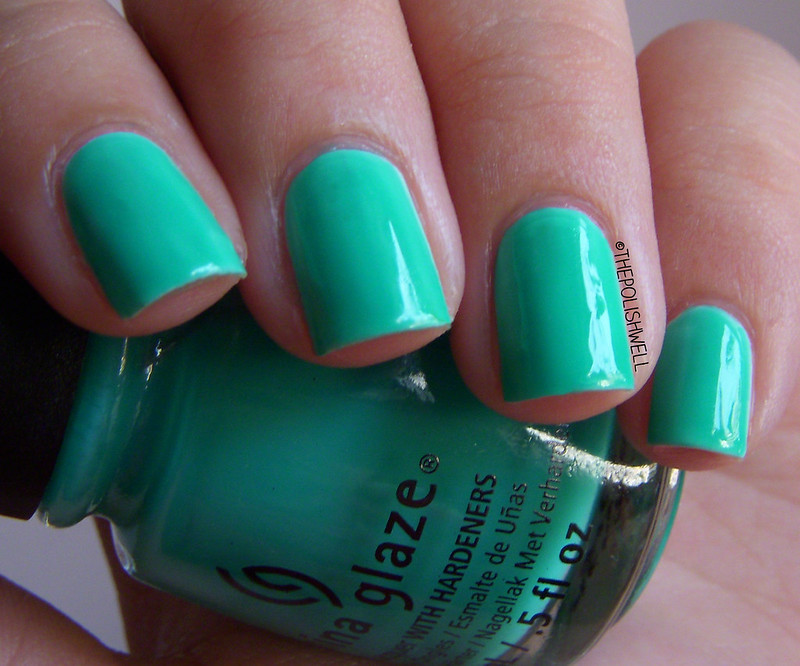
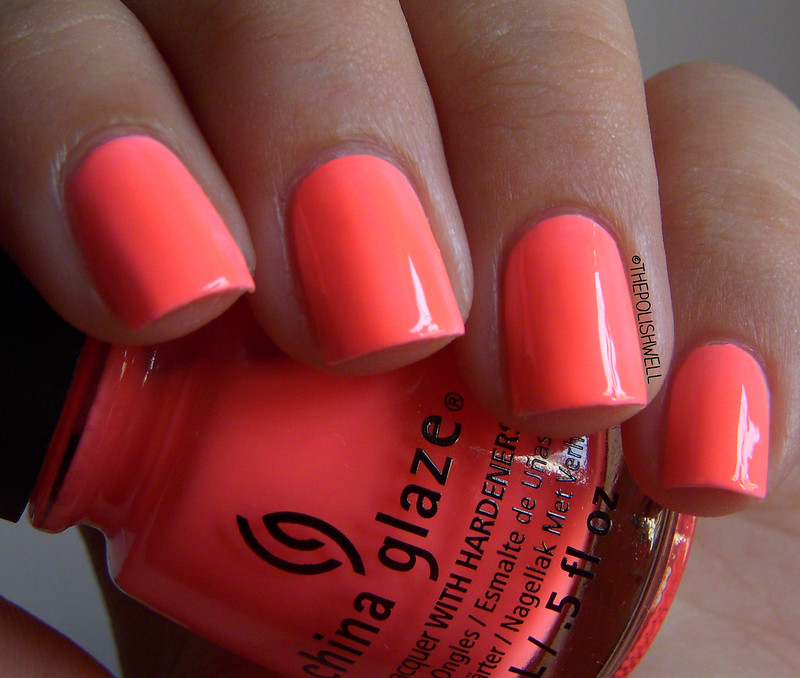
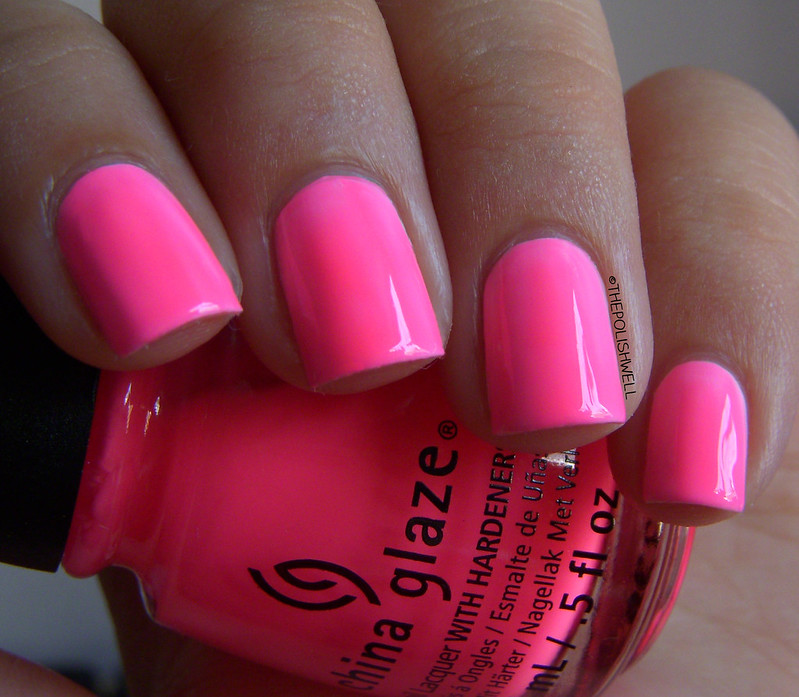
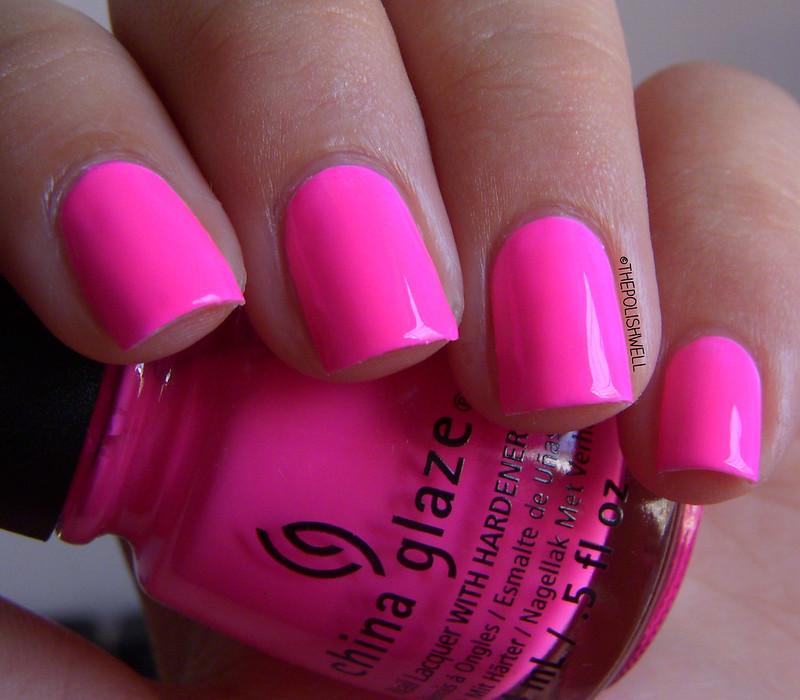
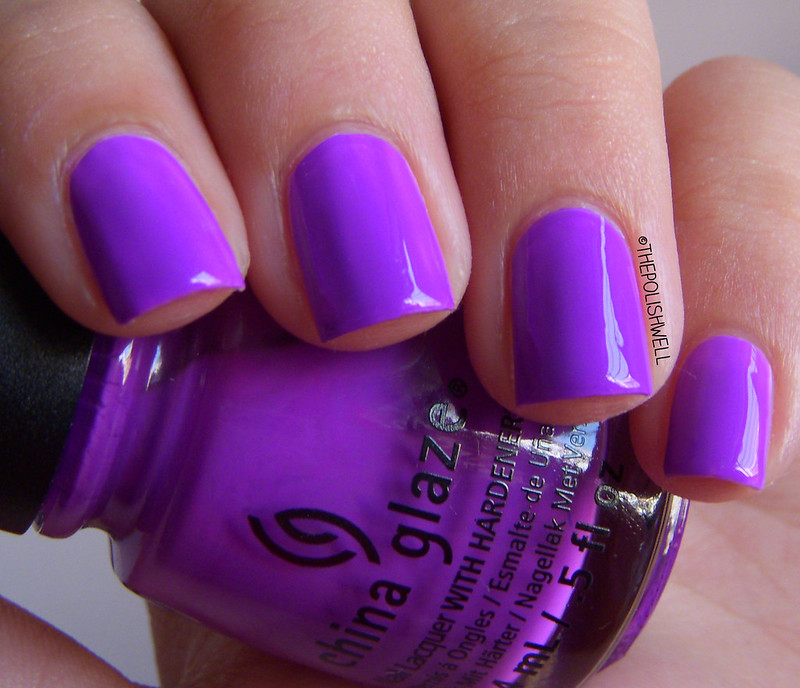
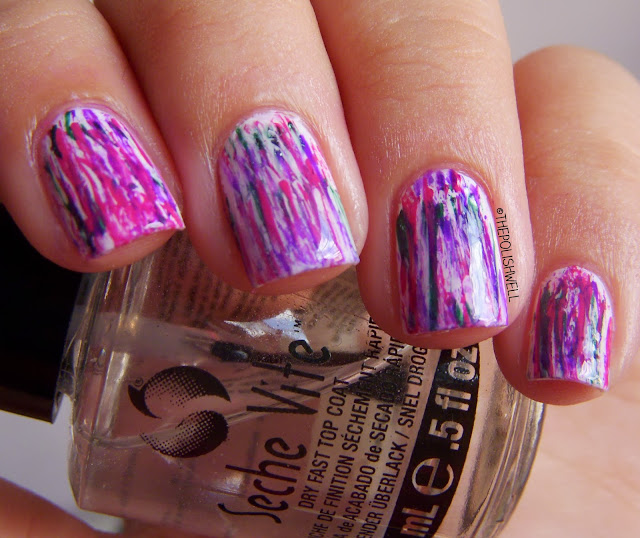
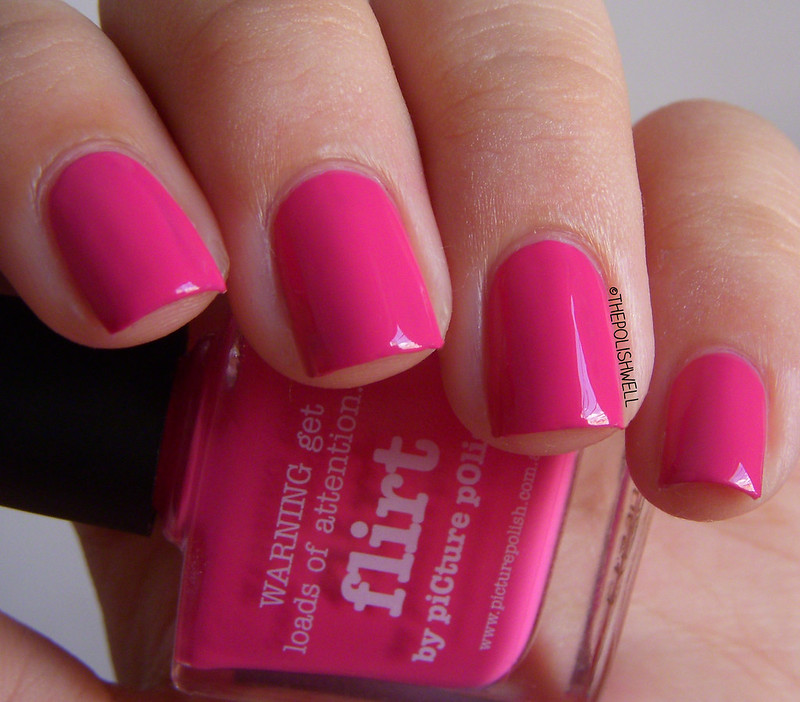
Oops! A little late on this one but I thought I should share this anyway because I love to match my nails to my outfit. It really completes the look!

Swatch it, watch it, match it! China Glaze® brings the world of nail color to life with the launch of the NEW China Glaze® App for iPhone®, iPad® and iPod touch®. The free app offers multiple features perfect for every nail polish enthusiast, and utilizes the latest cutting edge technology to transport users into China Glaze®’s colorful universe.

Nail polish enthusiasts will love the multiple features of the new China Glaze® App.

The new China Glaze® App offers a first of its kind “Match A Color” feature, where users can truly “Live In Colour” from the palm of their hands. “Match A Color” was created with the latest technology to allow users to take a photo of anything they desire with their iPhone®, iPad ® or iPod® touch and then browse through multiple options, from exact shade matches to related textures from the brand’s expansive treasury of over 300 colors.  This must-have feature allows nail polish enthusiasts to find polish-spiration anywhere at anytime.  That hot pink bag you were eyeing? Yep, there’s a China Glaze® polish for that.

In “Try It On,” users will find themselves in a China Glaze® fitting room, where they can select shades from the China Glaze® closet to try on customizable virtual nails. Users can determine which shade looks best on them by adjusting the nail length and skin tone to match their own hand, and save desired shades to the device’s camera roll for easy reference.

Sharing is caring, and in the colorful world of China Glaze®, “What’s Haute” is the place to see what’s hot. Connect here with the brand to see real-time updates of new collections, nail trends and “how-to” video feeds from the official China Glaze® YouTube Channel.  All features on the China Glaze® App allows users to share their favorite shades with their social media networks including Facebook, Twitter, Pinterest and Instagram. Did you say your friend really liked the shade Re-Fresh Mint you were wearing yesterday? Send the color straight to her Facebook page, or @her on Instagram.

Nail professionals, the China Glaze® app has something for you, as well. Salons and nail pros can register for product updates and to be listed in the Salon Locator feature, currently in development for future updates. Also in the works are features to expand the China Glaze® app into a true community, including Discussion Boards, Wish Lists and more.  

The China Glaze® App is available for free download from the App Store on iPhone®, iPad® or iPod® touch or at www.AppStore.com
.   

China Glaze® is free of DBP, toluene, and added formaldehyde. China Glaze® nail lacquers are available through salons and professional beauty supply stores nationwide. For more information, visit www.chinaglaze.com or follow China Glaze® on Facebook (facebook.com/chinaglazeofficial), Twitter (@chinaglaze), Instagram (@chinaglazeofficial) and Pinterest (@chinaglaze).

China Glaze® is a division of American International Industries.

About American International Industries
For 42 years, AII has been the leading manufacturer and worldwide distributor of innovative, quality beauty and skin care products for men and women.  Our product lines include Andrea, Ardell, Body Drench, Bye Bye Blemish, Checi, China Glaze, Clean + Easy, Clubman/Pinaud, Duo, European Secrets, EzFlow, Fright Night, Gena, GiGi, Gypsy Lash, IBD, It’s So Easy, Jeris-Lustray, LASH BeLONG, Nail Tek, No Tweeze/Micro Tweeze, 'N Rage, Poshe, Prolinc, RAW, Seche, SuperNail, Surgi-Care, Waterworks, Winning Nails, Woltra, Woody’s, and Youthair. For more information, visit our website: www.aiibeauty.com.

###

Do you match your nails with what you wear?

 photo xoxo_zpsaad7ebe5.png

Nail Ideas: Classy Studdicure

$
0
0

Erm, so yes, I don't really know what to name this post BUT let's not dwell on my lack of creativity and focus on these pretty studs instead:


I was browsing through the Born Pretty Store online when I chanced upon this set of studs and I knew I simply had to have it. There are 12 different kinds of studs - oh, just imagine the possibilities!

Of these, the donut / wheel stud caught my attention immediately. I haven't actually seen it being used before so naturally I had to try my hand at it and this is what I (finally) came up with:

nail-art-studs

A simple design with a silver donut/wheel stud and two black studs, one in the center of the silver donut/wheel stud and the other just below it. I started with two coats of Orly White Champagne - a beautiful shimmery white. Then, I topped it with a coat of Seche Vite and stuck the studs on it before the topcoat dries. I thought the donut/wheel stud stuck out a little at the edges but it was surprisingly firm on the nail. I didn't leave it on for too long though so I am not sure if it will last beyond a day.

To be honest, I am on the fence for this one. It looks a little strange close up but I think it looks rather classy at a distance - probably something I can wear to a semi-formal event?

What do you think of this manicure?

Just in case you are wondering, you can find this set of studs (Item ID: 4993) at the Born Pretty Store here. And it looks something like that:


It is such a convenient and neat way to keep the studs! All you have to do is to turn the plastic cover and position the hole over the studs that you want.

Here's a quick view of all the studs in their little compartments without the plastic cover:


Born Pretty Store also has a wide range of nail art products and provide free worldwide shipping! Feel free to quote "HDL91" for a 10% discount when you checkout:


 photo xoxo_zpsaad7ebe5.png

**Products are provided for honest review. Please see our disclosure policy for more information**

Nail Art Brushes!

$
0
0

Happy Easter everyone!

I'm just popping by for a quick post because I had been really busy brewing magic potions in my cauldron for the past few days. You can catch a sneak peek of my concoctions at my Instagram page. Everything is still not finalized yet but I am hoping to get them ready soon!

In the meantime, I thought I should share one of my recent finds on Born Pretty Store:


Nail art brush p*rn! As much as I try to do my nail art with just one nail art brush, I have to admit that different nail art techniques require different nail art tools for the best effect. So I was pleasantly surprised to find this set of nail art brushes that contains almost every brush that I can think of!


The fine tipped brushes that I reach out for very often to do details.


Thicker nail art brushes - fine-tipped, flat-ended or angled. I simply must try the one-stroke nail art technique one day!


Striping brushes that are good for drawing stripes. I used to avoid these because I thought the long brushes are hard to control but I've learnt to love them.


Fan brushes! To be honest, I have been looking for them for a while now. I love how people have used them for stripes, etc.


Last but not least, a fine dotting tool for some really precise dots.


Just in case you are wondering, you can find this set of 15 brushes (Item ID: 439) at the Born Pretty Store here for only about US$6 (definitely value for money if you ask me)! Born Pretty Store also has a wide range of nail art products and provide free worldwide shipping. Feel free to quote "HDL91" for a 10% discount when you checkout:


 photo xoxo_zpsaad7ebe5.png

**Products are provided for honest review. Please see our disclosure policy for more information**

The Polish Well: New Releases + Restock!

$
0
0
Hello everyone!! *waves excitedly*

Today, I will be officially unveiling the new colors that I have been working on! *happy dance* I have not just one but two collections this time.

Before we move on to the colors, I must apologize for not having my usual hand swatches. I had been too busy for the past few days and not to mention busy pampering my sadly ravaged cuticles from all the mixing and testing in my "lab".

First up, we have the summer collection:


This is loosely inspired by good ol' retro days and contains two subtle linear holos, two shimmers and two glitter polishes - something for everyone!

the-polish-well-blue-bell-bottoms

Blue Bell Bottoms.
A dusty dark blue with a subtle linear holo effect. Unfortunately, the swatch stick dulled the holo so you can't really see it in this picture. I really ought to have taken a picture of this on my nails in the sun but I couldn't find the time. ><

the-polish-well-tea-party

Tea Party.
A dusty mauve lilac with subtle linear holo effect. Again, the swatch stick dulled the holo so you can't really see it in this picture. I don't know about you but this color makes me want to have a high tea with my girlfriends ;)

the-polish-well-skinny-dipping

Skinny Dipping.
A green-toned turquoise jelly with gold and copper shimmer. You know how obsessed I am about turquoises and gold so I simply had to try my hand at making this. To be honest, I am pretty happy with how it turned out ^_^

the-polish-well-pompadour

Pompadour.
A dusty rose pink with copper and taupe shimmer. Girly vintage.

the-polish-well-primadonna

Primadonna.
A peachy beige jelly filled with red and black glitters and subtle orange shimmer. Inspired by the song by Marina and the Diamonds - hence the heart glitter. I was sorely tempted to make a dark red color for the pin-up girls that were so popular in those days but I figured this is more appropriate for summer.

the-polish-well-polkie-dottie

Polkie Dottie.
Grey with brown, turquoise and white glitters and subtle holo shimmer. I saw a phone cover in these colors somewhere and I fell in love. It isn't very summer-ish but the glitters remind me of polka dots so in it goes to this collection!

And now, we move on to The Jewels!
Disclaimer: I do not proclaim to be an expert in jewels and the colors are loosely named after the gems for the color and are in no way meant to resemble the real deals (or fictitious ones for that matter)!

I realized I forgot to take a family portrait for these so we will have to make do with individual swatches:

the-polish-well-dresden-green

Dresden Green.
An emerald green subtle linear holo. Again, you can't really see the subtle linear holo in this picture. It is probably similar to Glitter Gal's Lizard Belly in terms of its holo. A note of caution: this color stains so do take note before you buy it!

the-polish-well-heart-of-the-ocean-2

Heart of the Ocean.
A sheer dark blue base with gold shimmer and duochrome flecks that shift from blue to green. Blue and green and gold? Yup, one of my personal favorites.

the-polish-well-Moussaieff-red

Moussaieff Red.
A sheer blackened red base filled with lots of red glitters and shimmers with sprinkles of gold. Can look lighter or darker depending on the lighting. I personally prefer it under very low lighting - dark with mysterious sparkles of red and gold *swoon*

And finally a random color that did not fit into any collection:

the-polish-well-concrete-jungle

Concrete Jungle.
A dark grey with black and white shreds and generous sprinkles of holo shimmer. A random color with an equally random inspiration - a floor that I saw somewhere. ;p Odd as the inspiration may be, I love this combination.

PHEW! That was quite a lot of polishes!
Which ones caught your eye? :D

Before I end off this post, I have another piece of happy news to share: I am finally restocking my Etsy store and will be releasing these new colors this Saturday, 6 April at 9am Singapore Time! Details of the restock are as follows:

  • All new and old colors will be available except Wrath, Envy (these are discontinued until further notice due to lack of supplies). 
  • Prices are as follows: 
    • US$8 for 10ml and US$4 for 5ml; 
    • additional US$1/0.50 each for holos
  • Sales will be on a made-to-order basis and it should take about 1-2 weeks for your package to be mailed. 
  • All shipping will be via registered mail and shipping costs are tentatively as follows: 
    • International: US$6 for the first 10ml / US$3 for the first 5ml (whichever is higher) + US$1 for each subsequent. 
    • Singapore: Shipping to local addresses are at a flat rate of US$3.
  • Any updates will be posted at the Etsy store so do keep a lookout for that.

Hope to see you there! :D


 photo xoxo_zpsaad7ebe5.png

Thank you!

$
0
0
Happy Sunday everyone!

First of all, I would like to thank those who took part in yesterday's restock! Thank you so much for your support! There are some colors that were sold out but I've since relisted more for those colors. I will try to keep all the colors in stock as far as possible so you can hop over to my Etsy store any time :)

And today, I bring more good news for all you lovely ladies! <3

In conjunction with NailVibe's second anniversary at China Square Central, I've paired up with NailVibe to give three lucky winners... a 15% discount voucher each! \o/


This giveaway will run from 7 April 2013 to 14 April 2013, 9 am, Singapore Time.

All you have to do is:

  1. Follow @NailVibeSG on Instagram AND
  2. Register on Nailvibe.com (registration is free!)
  3. Then, comment below with your IG username and customer ID from the registration.

This giveaway is open INTERNATIONALLY.
Be rest assured that NailVibe ships international as well so you will be able to use the voucher code even if you are not in Singapore:


Winners will be announced on 15 April 2013 and will have 48 hours to claim their prize (more details to follow).

Good luck!! :D


 photo xoxo_zpsaad7ebe5.png

Update + Franken Fail

$
0
0
I am suchhhh a terrible blogger for not posting as regularly as I wished. The past two weeks have been crazy for me. My cousin fell quite ill and was warded for a few days. Then, my sister went for an operation because she tore her ACL and meniscus in her knee. Thankfully, they are both discharged from the hospital now and are recovering at home.

Just when I thought I could do some swatching over the weekend, it had to rain so I had to ditch my plan :(

Instead, I spent some time rushing out the orders that have been placed so far. I've shipped out more than half of the orders (check your email for shipping notification!) and plan to ship the rest of the orders out this week. Please accept my sincerest apologies for the terrible delay. ><

As I was filling up the orders, I had a sudden urge to try duping Butter London's Two Fingered Salute and this is what I've got:


Clearly I am a long way off. The color is not exactly right and the flecks are definitely not as copper as I would like. Oh wells. I wish I could get my hands on some TFS naoooooooooo!! *sad panda*

What about you? Are you the lucky owner of BL's Two Fingered Salute?


 photo xoxo_zpsaad7ebe5.png

OPI: Pirates of the Caribbean - On Stranger Tides

$
0
0

So, I'd lost my blogging mojo for a few weeks. To be more accurate, I actually bordered on losing interest in nail polishes altogether. Terrifying, I know... But there are many reasons that drove that crazy idea into my head - work, filling orders from my Etsy store and my stubborn insistence to indulge in my other hobbies (eg. manga, TV dramas) till late in the night. With so many things to do, I hardly found the time to do swatches / nail art for the blog *hangs head in shame*

This went on for a few weeks and I finally decided to do something about it:

From now on, my Etsy store will only be opened on the first and last 3 days of each month. 

I thank you for your understanding. Hopefully, this will give me more time over the rest of the weekends to recharge and spend time on other things that I love too - including updating this blog! ♥

To kickstart the first post after my brief hiatus, I'm happy to say that I've finally gotten my hands on OPI's Pirates of the Caribbean collection! *happy dance* I am not even a fan of pastel colors (I love them but they don't love my skin tone) but I am all gaga over these colors. I believe this is the first time that I've spent slightly more money to get my hands on discontinued colors and I am not regretting it the least bit. Take a look:


opi-mermaids-tears

Mermaid's Tears. 3 thin coats.
Bright but slightly dusty turquoise. You know how much I love turquoises. Make them dusty looking and I'm completely sold. This is also the reason why I spent a couple of bucks more to get this one. Thankfully I didn't have to fork out retail price for it though - OPIs are going at about S$20 through the official retailer *winces*

opi-stranger-tides00

Stranger Tides. 3 thin coats.
A dusty murky green. I can't even begin to say how much I love this.

opi-skull-and-glossbones

Skull and Glossbones. 3 thin coats.
A beautiful light grey with hints of khaki green. I had dismissed this initially because I thought it would look horrid on me but it rocketed to be one of my favorite colors in this collection. The green is just enough to make it wearable and unique. Simply perfection.

opi-steady-as-she-rose

Steady as She Rose. 3 thin coats.
A beautiful lilac shade-shifter. It leans more pink or purple depending on the lighting. Another must-have. Work appropriate too!

opi-sparrow-me-the-drama1

Sparrow Me the Drama. 3 thin coats.
Soft bright pink. I don't really like bright pinks but I make an exception for this - it is bright but dusty enough for my liking.

opi-planks-a-lot

Planks A Lot. 3 thin coats.
A beautiful dusty red-toned purple. I thought it was similar to a-england Guinevere but this is less dusty and brighter.

Yup, I'm seriously in love with all the colors in this collection. If you are a fan of dusty shades, you wouldn't want to miss this collection... well, except the silver shatter perhaps - because it is passé. Although the collection has been discontinued, I believe it is not difficult to find them online on eBay, etc. My advice? Grab them before they become really HTF.

Which color(s) do you like?

 photo xoxo_zpsaad7ebe5.png

Illamasqua: Raindrops

$
0
0

A quick post today because I was a little busy over the weekends...

Presenting... Illamasqua's Raindrops!


Raindrops. 3 thin coats.

A blue-grey jelly filled with sprinkles of tiny silvery white flakies meant to resemble its namesake.

One of the most raved-about color released by Illamasqua. It was first introduced as part of the winning trio of Illamasqua's polish design contest but it was discontinued before I could get my hands on it (I was certain my wail of anguish could be heard all the way at the other side of the globe). Thankfully, Illamasqua recently re-released it as part of their Broken Heart Collection and, having learnt my lesson, I immediately placed an order for it.

The emo-gal in me fell in love with the inspiration and Illamasqua certainly didn't disappoint. Raindrops is the perfect portrayal of a rainy day. The little flakies are much more visible in real life than what the swatch picture shows - closer to what you see in the close-up picture on the left.

Application was perfect as well. I've heard that the previous batch of Raindrops was really sheer but I did not have much trouble reaching opacity with 3 thin coats.

I've heard that Illamasqua also released an accompanying Pink Raindrops but I skipped it because I am not that fond of pink.

What do you think of this? Did you get your hands on any of the Raindrops?

 photo xoxo_zpsaad7ebe5.png

NCLA Nail Wraps: Reflect Yourself

$
0
0

A while ago, Nail Polish Canada started to carry the popular NCLA nail wraps in their store and contacted me to do a review. After starting working, I hardly had the time to do nail art so you can imagine my joy and excitement at having the chance to wear fancy nails after so long! There are several gorgeous designs available at NPC and it took me a long time to decide on two designs.

This is the first design that I've picked:


ncla-nail-wraps-reflect-yourself03

Reflect Yourself.
A beautiful mosaic design that makes me feel like my nails are encrusted with jewels.

Application is very simple. The official instructions are:

  1. Clean your nails with nail polish remover.
  2. Apply a coat of clear nail polish - let dry.*
  3. Choose the right size for each nail and peel from the sheet by the flap (the tab).
  4. Apply the round side against the cuticle. Wrap can be removed and stretched to fit.
  5. Once in position, firmly flatten the wrap starting from the cuticle. 
  6. Use the nail file to file away the excess in a downward motion.
  7. Apply another coat of clear polish for seal and shine.
  8. Removal: simply peel them off your nails. 

*I definitely recommend applying a coat of clear polish before any application. This will help to protect your nails when you remove the wraps. The nail wraps are quite adhesive because, well, they are meant to stick onto the nails firmly. While this is good, it may peel off the top layer of your nails if you apply the wraps directly onto your bare nail. I applied a coat of base coat and a coat of top coat (a little too much? lol!) before using the nail wraps and the wraps only took off small pieces of the top coat without damaging my nails.

I am pleasantly surprised to find the smaller nail wraps nicely sized for my nails. I could apply most of them directly without any trimming. For the ones that are slightly larger, I trimmed them slightly with a pair of scissors before peeling them from the sheet and applying them on my nails.

The wraps are thin and very easy to apply. While I did not have to stretch them because my nails are relatively flat, I did notice that the wraps are very flexible and it should be able to stretch to fit curvier nails without any trouble as well. 

Unlike the other nail wrap that I've tried previously, the NCLA nail wraps do not disintegrate with a top coat (thankfully!). I put two coats of top coat over the wraps to give them a mega-shine.

Each nail wrap kit is US$16 and comes with 44 wraps of different sizes (printed on 2 sheets) and one nail file. Quite value for money if you ask me. There are enough wraps to use for at least 4 manicures - more if you do not discard the excess from the larger wraps. Of course, it is also good as a quick and easy accent nail to spice up a manicure:


ncla-nail-wraps-reflect-yourself01
OPI DS Extravagance with Reflect Yourself on accent
You can see the range of designs available at Nail Polish Canada here. The nail wraps ship free within Canada (and the US?) - no minimum purchase required!

Stay tuned for the second design that I've picked! It's a beauty too <3

What do you think of the NCLA nail wraps? Have you tried them before?


 photo xoxo_zpsaad7ebe5.png

*Product provided for our honest review. Please see our disclosure policy for more information.*

NCLA Nail Wraps: Aqua

$
0
0

Oh hello weekends! I know I ought to be perkier than this but I am completely exhausted after an informal chill-out session with my colleagues at my boss' place last night - the official event was named "primer on wine and cheese tasting" but it was much more fun than having a lecture of sorts and I really enjoyed myself there. Don't worry, I didn't indulge in too much alcohol (I can't really drink!) and didn't make a fool of myself in front of my bosses (I think).

Anyway, a quick post before I KO for the day. As promised here's a swatch of the second nail wrap design that I've picked from Nail Polish Canada:


Aqua (2 coats of top coat).
A simple but beautiful color-blocking design. I have been meaning to do a color-block like this since forever but I never got around to doing it because I dread fumbling with the tape - I suspect I spend more time untangling myself from the roll of tape than creating the design on my nails. Oh wells.

For details about the application of these NCLA nail wraps, head over and check out my previous post here.

There are many more pretty designs available on Nail Polish Canada here.

So what do you think of these nail wraps? What are your experiences with them?


 photo xoxo_zpsaad7ebe5.png

essence: Spring / Summer 2013

$
0
0

Happy Sunday everyone! ^_^

I'm feeling particular exuberant today because the air in Singapore has cleared up somewhat in the last two days! The past week had been absolutely horrible. Fires raging in Sumatra caused a huge haze in Singapore with the PSI readings hitting the hazardous range for the first time in years. I have been shuffling to and fro work with a mask because the haze (oh the burning smell!) was giving me a tremendous headache. So I am really relieved that we have some brief respite over the weekends - finally some remotely breathable air! Of course, it would be even better if the government could declare a stop work order next week... yea, I've been told that I am too optimistic :(

Anyway, back to the polishes!

essence Singapore has recently brought in some new shades for spring and summer and they have most generously sent them over for me to share with you. I don't have much to say except that these colors are simply perfect springy/summery shades! Take a look:


essence-ice-ice-baby

Ice, Ice Baby! 4 thin coats.
A squishy off-white jelly that is slightly tinged beige. A little streaky on the first 2 coats but evens out to a perfect glossy finish. It didn't really need the top coat but I top-coated it anyway to speed up the drying process.

essence-peach-cream

Peach & Cream. 3 thin coats.
A soft peach puff with slight pearly shimmer. The pearl finish is not that obvious on the nails after 2 coats so that's a big plus for me - I am not really a fan of that finish. I did not think the color was very flattering on my skin tone under some lighting but I wore it for a few days anyway because it went well with my new turquoise phone casing! :P

essence-thats-what-i-mint

That's What I Mint! 3 thin coats.
A soft pastel mint with very very slight green shimmer (that is clearly not visible on the nails). You know my obsession with blue-greens - this was instantly my favorite. Of course, I wore it for a few days because it matches my phone casing too! ;) It is a tad lighter than China Glaze's For Audrey and they will make a good ombré manicure - I just need to find 3 more shades of turquoise / mint... See! That's why I need more shades of this color in my life. *nods solemnly*

essence-hello-marshmellow

essence-hello-marshmallow2
Hello Marshmallow! 3 thin coats.
A delicate lilac with sprinkles of red and blue shimmer. The shimmers are not that visible on the nails but you can catch a few glimpse of the elusive shimmer where the light hits the nails. It is significantly less similar to China Glaze's Light As Air than I'd thought - more purple and brighter.
essence-flashy-pumpkin

Flashy Pumpkin. 2 thin coats.
An eye-searing tangerine orange. It is so bright that I would even call it neon. Super summery but definitely not for the faint-hearted. Formula for this was exceptionally good. It is very pigmented and I suspect you can get away with one thick coat.

essence-prom-berry

Prom-berry. 2 thin coats.
An intoxicatingly rich vampy purple with very subtle red and blue shimmers. The shimmers are not obvious on the nails but they give the nails a slight glowy look when the nails catch the light.

essence-miss-universe

essence-miss-universe2
Miss Universe. 1 coat over black.
A sheer black base filled with intense sparkly blue and green microflakies.   It is very sheer and will need about three to four coats for full coverage on its own. Very similar to Zoya's Kotori except that it has that extra oomph from the bright green sparkles. Needless to say, I am head over heels in love with this too.


Overall, I am extremely happy with the new colors. The colors, brush and formula do not disappoint. As always, the pastels are slightly streakier than the other colors but they even out fairly nicely on the third coat so I have no complaints there. Plus, at only S$2.90 each, they are a steal - definitely one of my favorite affordable brands.

So, which colors caught your eye? :D

essence cosmetics is currently available at these Watsons stores: Ngee Ann City, City Square Mall, Causeway Point, Lucky Plaza, Plaza Singapura, Bugis Junction, Sun Plaza, JEM, JCube, Parkway Parade, IMM, Lot 1, Anchor Point, Rivervale Mall, Park Lane, Bedok Central, Beautyworld Centre and SMU.


 photo xoxo_zpsaad7ebe5.png

Mont Bleu: Glassware

$
0
0

*waves lazily* Such a perfect weather for sleeping in today! The light drizzle, the cool breeze... zzzz..
So why am I up on a lazy Sunday? Well, a close friend of mine recently introduced me to World of Warcraft and gifted me with a copy of the game (yea she is awesome!!). Since I am going for a call break later this week, I figured I should start prep-ing by downloading the game and readying myself. This is my first MMORPG so I guess I need to do some homework as well heh. Hopefully I won't be a complete fumbling fool when I start playing. ;P

Anyway, while waiting for the download and installation to be done, I have some goodies from Mont Bleu to share with you today!

I stumbled upon Mont Bleu through various nail blogs that I frequent and fell in love with their beautifully decorated glass nail files. Yup! Mont Bleu Ltd Company is one of the world leading suppliers of glass nail files. Their glass nail files are made of high quality Czech glass; they are decorated by patterns, or by Swarovski crystals. Not only that, they also provide a whole range of products adorned with sparkly crystals! *turns into a magpie* Take a look!


Mont Bleu Glass Nail Files - regular and travel-sized.
I am not sure if I have ever talked about my manicure routine (it is definitely on my to-blog list but I don't think I've ever sat down to work on it >.< ) but one of my essential manicure tools is a glass nail file. They are generally of a medium-fine grit - enough to take down length without damaging your nails. I prefer glass files to the usual ones because they are built to last and don't have to be replaced - a thorough wash and quick dry makes it all ready to be used again. As such, the regular sized glass nail file is the only product that I requested to try when Mont Bleu first contacted me.

Prior to this, I had been using my trusty OPI glass file since.... way back in 2011. I was actually very happy with it until these Mont Bleu files came along and blew it out of the water. Not only are these files prettily adorned, they are surprisingly quick to take down length. That is a life-saver especially for impatient folks like me. <3


Mont Bleu Glass Foot File.
All reservations I had about my feet breaking the glass file melted away when I saw this file. It looks sturdy, feels sturdy and is sturdy. It has a coarse side and a smoother side. The coarse side is, well, coarser than the glass nail files but not too rough on the feet either. The finer side smooths everything thereafter. I love how smooth my feet feels after some filing. Definitely a keeper.


Mont Bleu Tweezer.
Tweezers are almost indispensable in my life. Apart from having one to shape my brows, I also have some tweezers lying around to pick up random things like studs/rhinestones for nail art or as a replacement for my fingers when my nails are still wet. As with most tweezers, this pair of tweezer from Mont Bleu is nicely slanted at the tips for easy shaping. It has a fairly good grip. Plus, I really like the brushed metal finish and the crystals - simple but very chic-looking.


Mont Bleu Metal Compact Mirror.
Another beautifully designed product from Mont Bleu. This is made from extremely reflective metal which I love but, unfortunately, unforgiving of the fingerprints too.


Mont Bleu Earrings.
It is not very obvious from my picture but these are quite sparkly in the sun. By now, you should know I have a soft spot for things like that - simple, elegant and sparkly. ;)

All in all, I am very impressed by these Mont Bleu products. In particular, I would highly recommend their glass files. You can take a look at the full range of Mont Bleu products here. Mont Bleu delivers its products internationally so happy shopping! ;)

 photo xoxo_zpsaad7ebe5.png

**Products were provided for our honest review. Please see our disclosure policy for more information.**

essence: Nail Care Products!

$
0
0

Happy weekend!! :D
This week has been wonderfully pleasant because I am officially on call break (break from work before I get called to the bar)! *happy dance* There is still about three weeks before my call date but I have to head back to the office in a week's time because... I couldn't say no to my boss. :(
Nonetheless, I had a really enjoyable (read: slack) week so far. I had planned to post earlier this week but, yea, I got distracted playing WoW. It is really too addictive! I haven't done anything except play all day.  o"o

*clears throat awkwardly*

Anyway, I have some essence nail care products to share with you today! When essence Singapore sent their new spring/summer shades over for review, they generously included samples of their nail care line as well.


essence Professional 4-in-1 Nail File. (S$2.90)
By now, you should know my preference for glass nail files so I was really hesitant to try this particular nail file from essence. The nail file has four different grits to: trim, clean, smooth and polish. I was pleasantly surprised to find that it did the job really efficiently. It was quick to take down length and smooth the edges. I liked that I have control over the filing by switching between the different grits. The only downside is that it will wear down eventually. But still, for S$2.90, it is still a fairly good option for those who do not like glass files.


essence studio nails 24/7 nail base and pro white hardener. (S$3.90 each)
The 24/7 nail base is a ridge filling base coat that dries almost matte. It reminds me a lot of my go-to base coat, NailTek Foundation II. I have yet to do a meaningful comparison between the two base coats but I will definitely post an update when I am satisfied with the testing.

The pro white hardener is supposed to strengthen the nails and promote nail growth. It also contains an anti-yellow formula to naturally lighten the nails and provide a high-shine finish. It is not obvious from the picture above but the base is lightly tinted blue to balance out the yellow hues on the nails. I would snap a comparison picture for illustration but my nails are currently differently stained because of the different colours I've been testing on them. It generally does make the nails look less yellow but I do find the blue hue a little too obvious when it catches the light. It is a saviour though if you intend to head out for the day but have no time to hide the stains under layers of polish - it dries relatively quickly so you can be out in no time at all.


essence nail polish corrector pencil. (S$4.90)
Ah! One of my favourite products. It is basically a clean-up tool to remove any mess that you may leave at the cuticles or the sides of the nails. I usually use a small brush dipped in nail polish remover for the clean-up but I must say that this pencil is definitely fuss-free and more convenient, especially if you are on the move. I find myself reaching for it for minor clean-ups even when I am at home.

The tip is angled much like the orange sticks so those who use orange sticks tipped with some cotton wool will find this familiar. It did take me some getting used to because it is stiffer and less malleable than my usual brush. That said, some of you may find it easier to control that way.

What really surprises me is that the remover within is acetone-free - it removes mess so efficiently that I didn't think it was acetone-free; almost as quickly as my pure acetone remover! It also contains jojoba oil (yay for moisturizer!) and cherry fragrance (eh... it reminds me a little of the medicinal syrups >.< ). The tip does get dirty after a few rounds of clean-up but the pencil comes with 3 replacement tips so clean-ups will be a breeze again.


essence studio nails caring nail oil. (S$3.50)
More moisturizer! This is a nail and cuticle oil that claims to promote nail growth if you rub it into the nail beds. I have yet to test the truth of that but I like that it is moisturising and has a fruity apricot scent. The applicator tip is soft and fuzzy and shaped like the corrector pencil. It holds quite a bit of oil so you might want to brush it near the bottle top to remove the excess oil before brushing it on your cuticles. A little goes a long way!

There are many more nail care products by essence that are available at the following Watsons stores:
Ngee Ann City, City Square Mall, Causeway Point, Lucky Plaza, Plaza Singapura, Bugis Junction, Sun Plaza, JEM, JCube, Parkway Parade, IMM, Lot 1, Anchor Point, Rivervale Mall, Park Lane, Bedok Central, Beautyworld Centre and SMU.
You can also follow essence Singapore on Facebook for more updates!

Happy shopping! ;)

 photo xoxo_zpsaad7ebe5.png

**Products were provided for our honest review. Please see our disclosure policy for more information.**

Femme Fatale Cosmetics: Gilded Rose, Scorchling, Incendius and Chocoholic

$
0
0

By now, you should know that I am utterly obsessed with Femme Fatale Cosmetics. For the uninitiated, FFC is an Australian indie brand that is known for its unique and gorgeous glitter mixes. From right at the start, Sophie, the creative genius behind FFC, never failed to impress me with her eye for colour and her sense of depth - two important factors that make a polish look complete. In fact, her polishes were a part of the reason why I got started on Wow (yup, she takes some of her inspirations from the game too!).

Still not convinced? Just take a look:


femme-fatale-cosmetics-gilded-rose

Gilded Rose. 1 coat sandwiched between OPI Barre My Soul.
Gilded Rose is a glitter bomb filled with gold, pink and even sprinkles of purple glitters of different shapes (including stars!) and sizes. As it has a clear base, it is very versatile and can be used as a topper over different colours - in the first picture, I layered it over OPI My Very First Knockwurst on a swatch stick; Bec of Nail Gun XS also has a gorgeous swatch of it over a metallic pink. For this swatch, I chose to do a squishy jelly sandwich with OPI Barre My Soul for a more delicate look. <3

femme-fatale-cosmetics-scorchling

Scorchling. 1 coat dabbed over Illamasqua Vice.
A sheer berry-red jelly filled with red, burgundy and black glitters and pops of red and blue shimmer. One of my favourites and a prime example of why I love FFC polishes - the colour and glitter mix are just so perfectly balanced for a bold fierce look.

femme-fatale-cosmetics-incendius

Incendius. 1 coat dabbed over Michelle R3.
Another clear-based glitter topper. This is filled with red, orange, gold and black glitters of various shapes and sizes. I had layered it over a dark shimmery red for a fiery look but the glitters really pop if you layer it over a black - in the swatch stick above, I layered it over a near black, Wet n Wild Under Your Spell.

femme-fatale-cosmetics-chocoholic

Chocoholic. 2 coats over Essence Wanna Say Hello.
This is a sheer dark plum base filled with tiny brown glitters and larger brown hexes accented with sprinkles of royal purple and some pink and blue dots. So deliciously dark and rich, I had to stop myself from taking a bite. Love it so hard!


So, what do you think of these FFC polishes?

FFC is available on their website at http://femmefatalecosmetics.com.au/.
At the moment, FFC does not ship polishes outside of Australia but, thankfully, us international girls can satisfy our lemmings at one of their stockists. You may also wish to try your luck at their clearance section - these polishes are available for shipping internationally subject to a limit of 6 bottles.

You can follow them on Facebook, Twitter and Instagram for more updates!


 photo xoxo_zpsaad7ebe5.png

**Products were provided for our honest review. Please see our disclosure policy for more information.**

Rainbow Honey: The Summer of 199X

$
0
0

So back in those days when WoW was just introduced to the world, gamers were apparently getting their kick from SNES Earthbound. I had never tried it myself because I was still too young and probably rolling stupidly in the sand at a playground near my house.

Nonetheless, I was totally psyched up when Rainbow Honey announced its newest collection, Summer of 199X featuring 10 new colors inspired by Earthbound. Even though I could not identify the references to the game, there is no denying the beauty of these polishes. Rainbow Honey generously sent three polishes for me to share - just take a look:


rainbow-honey-mint-flavor

Mint Flavor. 3 thin coats.
Part aqua, part baby blue, part shimmer, this was hands down the best window flavor. Because...you taste windows, right?
A soft aqua blue with subtle green shimmer. I especially love that flash of shimmer. Formula was a bit tricky (as with most pastels) but totally worth it. So delicate and pretty. Easily my favourite of the trio. ♥
rainbow-honey-apple-kid

Apple Kid. 2 coats.
This bright and rosy fuchsia creme won't build you any useful contraptions but it is filled with more shimmer than you can shake a Pencil Eraser at.
A brilliant hot pink with tiny pink flecks that shimmer and shine when they catch the light. Very flattering on the nails - definitely a head-turner.

rainbow-honey-i-miss-you

I Miss You. 1 coat dabbed over Essence Hello Marshmallow.
I Miss You is a pastel rainbow of glitters and shimmer, these butterflies are sure to cure the homesick traveler.
A delicate pastel glitter mix filled with primarily baby blue and pink glitters and a generous sprinkle of tiny iridescent glitters and blue shimmer. The formula is a tad thicker than the other two colours but the glitters apply easily over the nail. I did have to prod at the larger glitters a little to place them where I want them to be.

And just because I can, I added a matte top coat over them for a daintier effect ♥

rainbow-honey-i-miss-you3


Yup, Rainbow Honey most definitely hit the ball out of the park with this collection! Apart from these trio, they also have other mind-blowing glitters and pretty shimmers - something for everyone!

So what do you think of these colours?
Which colours from the Summer of 199X caught your eye?

Rainbow Honey is available on their website. They do not ship internationally but international girls can also get their hands on RH pretties through their stockists. ^_^
You may also wish to follow Rainbow Honey on Facebook for more updates.


 photo xoxo_zpsaad7ebe5.png

**Products were provided for our honest review. Please see our disclosure policy for more information.**

China Glaze: Sunsational Cremes

$
0
0

Hola!! After enduring a terrible work week, I thought I would chase away all my sorrows and brighten up my weekend with some neons (pun completely intended)!

Despite all the hype over neon colours in the polish community, I have always avoided neons because I found them too stark and too eye catching for my taste... that is, until I saw the promotional pictures of China Glaze's neon releases for summer 2013. The pastels called to me and my eyes were immediately drawn to the blues and greens. I knew I had to have them. And I was right! Take a look:


Disclaimer 1: I've tried my best-est of best-est to get colour accurate pictures but my camera just refused to handle so much awesomeness. They are brighter in person.

Disclaimer 2: I did not go for any tanning session. The neons are so bright that my camera (and even my eyes) decided that I must have become tanner some what. Silly them.

china-glaze-too-yacht-to-handle

Too Yacht to Handle.
Yup, this is a almost-neon sister of the famous For Audrey. It looks identical to For Audrey but when you put them side by side, you will notice the difference immediately. Too Yacht to Handle is a bajillion times brighter and For Audrey looks really dusty in comparison. Too Yacht to Handle also comes across as being slightly greener. Both are gorgeous in their own right.

china-glaze-highlight-of-my-summmer

Hightlight of My Summer.
A yellow-leaning pastel mint green. I really like it more than I'd expected. It is really bright. I'd thought Illamasqua Nomad is bright but it pales next to Highlight of My Summer. Nomad also has a tinge more blue than Highlight of My Summer. Yup, I do love these two colours.

china-glaze-sun-of-a-peach

Sun of A Peach.
An eye-searing neon peach. Ughhh I love this so much - unexpected favourite. Awesome colour with an awesome name to match. Just plain awesome. I wore it when I dropped by my workplace during my call break (needed to settle some personal matters) and my friend was completely blown by how fluorescent my nails were. Yup it is that bright.

china-glaze-neon-on-on

Neon & On & On.
A neon pink with just a touch of coral. I thought I wouldn't like it but the coral is making me mince my words. Also an unexpected favourite.

china-glaze-bottoms-up

Bottoms Up.
A neon bubblegum pink with a touch of blue. I am sure this would grace Barbie's nails during summer.

china-glaze-thats-shore-bright

That's Shore Bright.
A bright red-leaning purple. The least neon of the collection - is it a neon? Nonetheless, it is still a fun summery colour to sport.

Now, you may have already heard of this already. The formula of these colours are not the nicest to work with. They apply streakily and do not level on their own. I suspect the white in the pastels is not playing nice - as usual. I found that it helped a little to use piCture pOlish's Revolution (meant to be a glitter base but it did not work as well as I had hoped it would be) - the colours applied less patchily that way. Seche Vite did wonders to level out the streakiness as well.

Nonetheless, I am really head-over-heels in love with the sunsational cremes. I liked that they are not the usual highlighter colours. They look less stark that way, don't you agree?

Ever since I have received them in my mail, I've pulled them out countless times to wear them one way or another. Just before I came back to work, I did this completely work-inappropriate mani just because I can ;)

nail-art-china-glaze-sunsational

I started with a white base and randomly sponged on the colours from the Sunsational cremes before topping them with a coat of black shatter. Oh yes, shatters do look good once in a while ;)

So what do you think of the Sunsational cremes?
My personal favourites are Sun of a Peach, Too Yacht to Handle, Highlight of My Summer and Neon & On & On... ok. That's not really helping :P
Which colour is your favourite?

Stay tuned for swatches of the other half of the collection ♥

 photo xoxo_zpsaad7ebe5.png

**Products were provided for our honest review. Please see our disclosure policy for more information.**

China Glaze: Sunsational Jellies

$
0
0

Finally, the second half of the China Glaze Sunsational Collection - the jellies!


As you may have already heard, some of the jellies are quite sheer so I chose to layer all the colours over white in my swatches below.

china-glaze-isle-see-you-later

Isle See You Later. 4/5 coats over white.
A blue jelly. The sheerest of the whole collection. It is so sheer that I wouldn't advise you to try getting it to reach opacity on its own. Because it is so sheer, the blue does not come across as deep as it looks in the bottle. Nonetheless, it is a gorgeous bright baby blue on the nails when layered over white.

china-glaze-keepin-it-teal

Keepin' it Teal. 4 coats over white.
A green-leaning teal jelly that is also on the sheer side but slightly better than Isle See You Later.

china-glaze-shell-o

Shell-O. 4 coats over white.
A coral orange jelly that screams fluorescent. With my thing for corals at the moment, it is no surprise that I really like this one.

china-glaze-heat-index

Heat Index. 3 coats over white.
Bright hot pink jelly. Very aptly named. Hmmm... I think the next time I will add another coat or two to get closer to the bottle colour. I am surprised that I quite like this one.

china-glaze-you-drive-me-coconuts

You Drive Me Coconuts. 3 coats over white.
A relatively more muted pink with blue undertones as compared to Heat Index. It is still very bright though. The formula is one of the better ones in this half of the collection - I suspect it can actually reach opacity on its own.

china-glaze-are-you-jelly

Are You Jelly? 3 coats over white.
Another bright purple! It is also more opaque but the formula is a little patchy.

Now that you've seen all the swatches of the China Glaze Sunsational collection, which ones are your favourite?
(psst! If you've missed out on my previous post, you can check out the first half of the Sunsational collection here.)

On the whole, formula aside, I must say I really enjoyed the colours that China Glaze has put out for this summer. I am especially in love with the cremes. Because of them, I am officially a neon convert now. No kidding, even as I type, I am wearing some of them as a gradient on my toes - no worries, I won't be posting pictures of that. ;)


 photo xoxo_zpsaad7ebe5.png

**Products were provided for our honest review. Please see our disclosure policy for more information.**

piCture pOlish Blog Fest 2013: Celebrating the Year of the Blogger!

$
0
0

After an agonising month of keeping my mouth sealed, I am happy to say that the day has finally come! Yup! It is time for piCture pOlish's Blog Fest 2013! For those who are new to the scene, piCture pOlish hails from down under and every year, a group of bloggers embark on a massive mission to swatch and showcase new colours from piCture pOlish for polishaholics to drool over. Well, at least that was what happened in the past...

This year, the girls from piCture pOlish decided to catch us all by surprise by having a huge competition instead to celebrate the Year of the Blogger! Yup! They have dedicated this event for all the bloggers and to celebrate what we do ♥ I must say, I was rather surprised and touched when I first heard about the theme for the blog fest this year. I might have mentionned it before but I think there are still many people out there who have the impression that nail blogging is a piece of cake. It looks deceptively simple but bloggers often put in a lot of effort to maintain their nails, painting them as perfectly as possible, photographing them accurately, editing the pictures and finally blogging about them - all these on top of living a regular everyday life (yes, we really do engage in other activities apart from painting our nails). For me, it has become slightly more challenging this year when I took on a full-time job after my graduation. I am often bone-tired after work and there were several occasions when I felt like throwing in the towel so that I can rest a little more during the weekends... but your comments kept me going, so here I am! ♥

So, before I digress further and get all soppy, let's talk about the competition, shall we? On 29 July, 7pm, local time, participating bloggers will showcase their own nail art creation to take part in the competition. All nail art creations will go into the running to be chosen to.... create a collaboration shade with piCture pOlish!! *excited dance* There are only three winners though - 1 voted by all of you, 1 voted by the participants and 1 chosen by the girls from piCture pOlish.

For this competition, I was given these three shades to work with:


Stunning, aren't they? I will post swatches of each of them but first... let's take a look at what I came up with. After wrecking my brains out, I've decided to unleash my inner Pollock to create this mani:


If you have been following me for a while, you would probably know that I can't really draw to save my life. And you should also know that it doesn't stop me from doing nail art ;) After all, there are plenty of nail art techniques that are really simple and idiot-proof! This is one of them. All you need is some pretty colours, a fan brush and follow these steps:


  1. Start the manicure with a coat of base coat to protect your nails.
  2. Paint your nails with a coat of white as the base colour and let dry.
  3. Drop a drop of polish on a piece of paper.
  4. Dab the fan brush lightly against the drop of polish so that the tips of the brush pick up some polish. You would want only a small amount of polish to get a streaky brushed look. 
  5. Run the fan brush down (or up) your nails to get streaks on your nails.
  6. Repeat steps 2-4 with other colours.
  7. Once satisfied, seal the design with top coat and you are done! (Clean up required, of course)

Because the design is really simple, you are free to use any colours that you like. Personally, I think analogous colours with a splash of complementary colour work very well to create a striking combination. If you like some texture, you may use varying shades of the same colour or make use of slightly sheerer colours to create the illusion of depth. The trio from piCture pOlish were perfect for this and that was one of the main reasons why I went with this design. 

Now for swatches of each of the colours:

picture-polish-flirt

Flirt. 2 coats.
A bright magenta that certainly deserves that warning label on the bottle. And yes, it is more flirtatious than sweet so bring it on ;)
Before I forget, this hawt babe is a one-coater that applies itself. Super fantastic formula.

picture-polish-violet-femme

Violet Femme. 3 coats.
A deep bright purple that is slightly sheer but builds up to opacity nicely. Dries to a matte-satin finish - I think it really does have neon pigments! - so a top coat is definitely needed. I really love this shade of purple.

picture-polish-kryptonite

picture-polish-kryptonite2
Kryptonite. 3 coats.
Now this is my kind of kryptonite. A deep dark green with chunks of holo particles and shimmers. Wonderfully shimmery and mysterious in the shade but all glowy and sparkly then it catches the light. You absolutely need to click through on the picture and look at the details in the original reso. I did not manage to catch the holo action but trust me, the chunky particles swimming in the dark green base is enough to make you weak all over too - well, maybe except the nails, they will be superhuman.


piCture pOlish is available on their webstore (everyday deals and international shipping available!) or through their network members. You can also follow them on Facebook, Twitter, Pinterest and Instagram for more updates.


 photo xoxo_zpsaad7ebe5.png

**Products were provided for contest participation. All views expressed are our own honest opinions. Please see our disclosure policy for more information.**

New & Upcoming Collections for Fall / Winter / Holiday 2013!

$
0
0


Happy August!
Gosh time really flies, doesn't it? Just a few minutes ago, I chanced upon some press releases on new collections and it hit me that I had completely neglected to keep up to date with the developments in the nail world! Now that is simply unbecoming of a nail polish addict, right? So... how about another TPW bumper round-up post for your weekend indulgence? ;)

OPI Fall 2013: San Francisco 

source
San Francisco by OPI brings street chic style with West Coast flair to nails and toes for Fall/Winter 2013. This new collection features a palette ranging from sky and sea-colored hues of blues and gray to reds, burgundies and browns inspired by some of the city’s most iconic elements – Chinatown, the Golden Gate bridge and the Embarcadero.
Many of you would have seen swatches of this collection floating around. Very standard fall colours that are strong and rich. Some metallic ones (too frosty for my liking, some crellies (yup, they sure did catch my eye), some liquid sands and even a duochrome (Peace & Love & OPI).
My picks would be Alcatraz, Keeping Suzi at Bay, In the Cable Car-Pool Lane and maybe Lost on Lombard... Still considering the rest ;)

Zoya Fall 2013: Cashmeres & Satins

source

Oh those cremes are killing me. I don't know what got into me but I am all for cremes these days. Make them in dark rich colours and you've got my heart. The satins are in metallic finish which some of you may like - I don't really like this finish but I have to admit the colours are looking really rich and glowy.
No surprise that I am eyeing Hunter (dark sea creme), Pepper (brick red creme), Sailor (dark navy creme) and Flynn (camel brown nude creme).

Zoya PixieDust for Fall 2013

source
Ahhhhh... I die for Carter.

China Glaze: On the Horizon

This free-spirited specialty collection introduces six unique lacquers using interwoven matte particles to create a feathered finish. The multi-coloured palette features both bright and earthy tones, reminiscent of the sky at dawn and dusk. Achieve opacity with two coats, or layer over a complementary base color for a fresh, colorful manicure.
Bar glitters! From what I gather, this is either a strong yay or a nay. I am not a fan of bar glitters - awkwardly hairy. But I have to give it to China Glaze for coming up with an interesting mix of colours.

China Glaze Fall 2013: Autumn Nights

source
Metallics, shimmers, foils and two cremes. Not usually a fan of the metallics but the colours look really rich. I do like the look of Goldie but Goodie and Rendezvous with You. 

Essie Fall 2013: For the Twill of it

source
source
For the Twill of It... it does remind me of OPI's Peace & Love & OPI, no? The rest of the colours look extremely comfy and perfect for fall/winter. Of these, I am loving Vested Interest. After School Boy Blazer did catch my eye initially but it looks a little too close to black on the swatches I've seen.

Orly Fall 2013: Surreal

(Launch Date: September 2013)
source
source
A very interesting dreamy fall collection I must say. Except for the dark teal, none of the colours look like the standard fall fare. Leaving that aside, I must say the shimmers really do look delicate and surreal. I will have to see swatches before deciding though. 

Color Club Fall 2013: Girl About Town

source
[L-R: Silver Lake, Williamsburg, East Austin, The Uptown, Wicker Park, Pearl District]
You should know which colour caught my eye - that duochrome flakie in a purple base looks absolutely stunning. I hardly use flakies but The Uptown sure does make me feel like putting them on again. 

China Glaze Fall/Winter 2013: Monsters Ball

(Launch Date: October 2013)
source
source
[L-R: Howl You Doin', Bat My Eyes, Boo-Gie Down, Fang-tastic; Bump in the Night (texture)]
Monsters Ball. I really do love this collection for its presentation. The names... the artwork (yup by Abigail Larson again! I am really loving her style ♥)... I am not good at describing but it does look like a whole bunch of classy fun. As for the colours, my eyes are drawn to Howl You Doin' and Bat My Eyes.

China Glaze Winter 2013: Crinkled Chrome

(Launch Date: November 2013)
source
Create an impact with Crinkled Chrome from China Glaze. Chrome meets pastel, giving feminine flair to this crinkled metal look.
Confession: I am still trying to figure out what a crinkled chrome will look like on the nails. Till then, I probably can't really comment much :P

Essie Winter 2013: Shearling Darling

(Launch Date: TBA)
source
Hmmm that luscious shimmery red. I hope it doesn't disappoint. I am also loving that pastel blue/grey.

Orly Holiday 2013: Secret Society

source
[L-R: Lavish Bash; Voyeuristic Adventure; What's the Password; Masked Ceremony; Macabre Masquerade; Risque Encounter]
I've seen some swatches floating around for this collection as well. I love Masked Ceremony. Macabre Masquerade caught me by surprise (really you ought to check out the swatches) and I am most curious about Lavish Bash.

China Glaze Holiday 2013: HoliGlaze

(Launch Date: November 2013)


source
[T - texture; G - glitter; A - aluminium]
Last but not least... a holiday collection by China Glaze! There wasn't much information I could find about this so most of what I know is from Rica. She has swatches here! Bells will be Blinging, This is Tree-mendous, Put A Bow on It and All Wrapped Up look promising. Apart from these, there will also be a Colour Travel Top Coat that is said to create an iridescent effect - shimmer top coat perhaps? We'll see ;)

Phew! That was a long post! I hope I did not miss anything out - do feel free to drop me a note below to let me know if I did!

And now, for the grand finale: Which colours caught your eye? :D


 photo xoxo_zpsaad7ebe5.png

The Polish Well: BANG!

$
0
0

Happy Sunday everyone!
I can't believe the long weekend (we had 2 days of public holidays on thursday and friday) passed by so quickly. I still don't feel adequately rested! T_T

Anyway, I thought I would share some of my new concoctions on the blog today. It has been quite a while but I've finally finalised a new collection that is based on one of my favourite korean bands - Big Bang! I was introduced to Big Bang by my sister earlier this year and have since been hooked onto quite a number of their songs. The idea of a collection came about way back in March when I had a sudden bout of inspiration and created Hallelujah. Since then, I have mulled over the rest of the colours and I am happy to say that I've finally made some headway. Take a look:

p.s. you can click on the lyrics to enjoy the lovely songs on youtube :)


Fantastic Baby.
A berry red jelly filled with an assortment of glitters - holos, reds, purples, circles, squares, hexes and a sprinkling of shimmer. I had such hard time coming up with a colour for this song. Every ounce of my instinct told me to throw a bunch of silver holo glitters together for the dance number but I wasn't sure if I could come up with a mix that is better than what is already available in the market. In the end, I scoured through the lyrics and settled on "heartbeat" for my colour inspiration. Even then, it took me several tries before I came up with this. Quite happy with the squishy look. :P


Ego.
Red with gold and holo shimmer. Slightly darker than what it looks in this picture. Unfortunately, I didn't manage to capture much of the shimmer in the picture either - it is slightly more visible IRL :(


Love Dust.
A soft greyish-blue mint with subtle holo. This was partly born from my obsession with turquoises and mint and partly from Deborah's (lovevarnish) request for a soft mint holo. I took a look at the bottle after the shaking and mixing and "Haru Haru" immediately came to mind.


Monster.
A sage green with rose flecks and subtle green shimmer. This is not new to the blog and some of you might already know that this was from my feeble attempt at duping Butter London's Two Fingered Salute. I've since gotten my hands on the real deal and they are definitely not dupes. While the base colours are almost, if not exactly, identical, the shimmer and flecks are completely different. Nonetheless, I really like this lab creation and it seems to fit with the song so I've decided to keep it in this collection. :P


Lies.
A deep teal with a mix of aqua blue and green shimmer. Another song that gave me a difficult time but I am glad I finally had an eureka moment.


Bad Boy.
A deep blue with a mix of copper, blue and purple shimmer. This was another song that was very challenging to put in a bottle. In the end, I went with the colours of a beautiful sunrise that I happened to catch. I think this one needs a bit more shimmer for the colours to pop.


Tonight.
A deep plum jelly with gold, royal blue and purple shimmer-flecks. This was an accidental mix that came about because I was curious what I would get if I mixed all my shimmers together. I didn't go further than these three colours when I fell in love and abandoned my initial quest. I will toy with that again in future - though I suspect it may not look fantastic.


Hallelujah.
A mix of holo silver, gunmetal and lavendar glitters and with a smattering of purple shimmer falling within the depths of the black jelly. My very first colour of the collection and one which I still love.


Blue.
A slate grey with blue, green and silver shimmer. Inspired by the very first Big Bang song that I fell for. My sister had been playing Big Bang songs for ages but this was the very first that caught my attention. Unlikely most other korean songs that my sister played, this was unusually mellow and emotional. Till now, it is still one of my favourite songs by Big Bang so there was no way I could leave this song out. 


Phew. That was quite a whole lot of polishes, wasn't it? 
Now that you've seen them, which one(s) caught your eye?

As you might have noticed, I have temporarily placed my shop on hiatus and I am no longer taking any orders at the moment. Although I've enjoyed creating these new colours, I have yet to firm up any plans for my store so these polishes (together with the other colours) are not available for sale at the moment. I will post an update once I have a plan. 

So why am I showing these new colours to you, you ask? 
Well... apart from the fact that I couldn't wait to show you my creations, I've also decided to throw a small giveaway to celebrate my birthday this week! ^_^

The prize? The entire unreleased BANG! collection (minis) for one lucky winner!

The giveaway is open on this blog (details in the rafflecopter widget) and on Instagram (details on my IG post). All entries will be collated for the draw so you need not enter twice - duplicate entries will be deleted before the draw.
The usual rules apply so fire away!
Giveaway closes in a week's time on 18 August 2013 at 12am, SGT. Good luck!


a Rafflecopter giveaway

 photo xoxo_zpsaad7ebe5.png
Viewing all 71 articles
Browse latest View live